ThinkLink APP User Manual
ThinkLink APP is a mobile client for industrial IoT field operations and real-time monitoring. Operators can review gateways, devices, scenes, and alarms; analyze live and historical data; and perform authorized remote RPC operations.
This guide applies to the current Android release. The interface may change slightly between versions, so use the live app and the deployment settings supplied by your administrator as the final reference.
Compatibility with the 2.00.073 update
This manual retains the existing APP interface instructions. Related mobile repositories were outside this update. APP compatibility for scene dashboards and the new binding workflow, and automatic opening of the main application after login, remain unverified. The first migration of the old structure in 2.00.072 clears legacy scenes and bindings and drops scene_dashboard. Read the Upgrade Notes; see Scene Management for the new PC workflow.
Overview
ThinkLink APP provides these primary capabilities:
- Home overview: Review gateway, device, asset, sub-device, and recent alarm status.
- Scene management: Browse scenes, bind devices, and open scene dashboards.
- Device insight: View overview data, telemetry, history, relations, thing models, and photos.
- Alarm response: Filter alarms, review details, add notes, and clear resolved alarms.
- Remote RPC: Send commands to authorized devices and inspect execution logs.
- Network and gateways: Query AS, NS, and IP data and review gateway runtime information.
- Multi-tenant and multilingual use: Switch organizations, interface language, and server environment.
Requirements
- An Android phone or tablet.
- Network access to the ThinkLink Mobile Server specified by your administrator.
- A ThinkLink account created and authorized by an administrator.
- The appropriate permission and maintenance window for RPC, gateway diagnostics, or upgrades.
Download and Install
Download the ThinkLink Android APK

- Scan the QR code with an Android device, or open the download link.
- If Android warns about installing an app from an unknown source, first confirm that the download domain is
thinklink.manthink.cn, then authorize this installation only. - Open ThinkLink APP after installation.
Installation safety
Install only the APK delivered from the official HTTPS address above. Do not install copies forwarded through messaging apps, file-sharing services, or unknown websites.
First-time Setup
Configure the server supplied by your administrator before signing in.
- Tap Server Settings on the sign-in screen.
- Select the required protocol and enter the host, port, service path, and MQTT address if applicable.
- Tap Test Connection.
- After a successful test, tap Save & Apply and return to sign-in.
- Enter credentials supplied by your administrator through a secure channel.
- Confirm that the active tenant or organization is correct after sign-in.
The source test environment used the values below. They illustrate the fields only and must not be copied into a production deployment:
| Field | Test example |
|---|---|
| Protocol | HTTP |
| Host | 192.168.1.216 |
| Port | 80 |
| Path | tkl-mobile-server |
| Full API base URL | http://192.168.1.216/tkl-mobile-server |
Production environment
The test address is reachable only from its corresponding private network. Use the address supplied for your deployment and prefer HTTPS with a trusted certificate. This manual does not publish any test username or password.
Page-by-Page Guide
01 Sign in
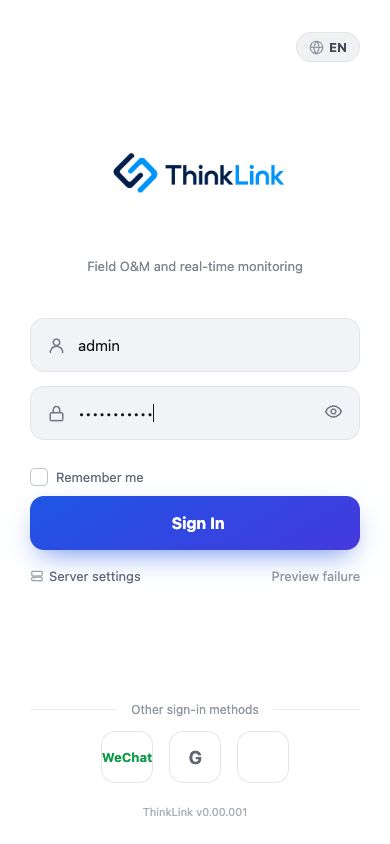
Entry: launch the app.
- Enter your account and password, then tap Sign in.
- Enable Remember password only on a private device.
- Switch between Chinese and English from the sign-in screen.
- Open Server Settings first when using the app for the first time or changing environments.
02 Server settings
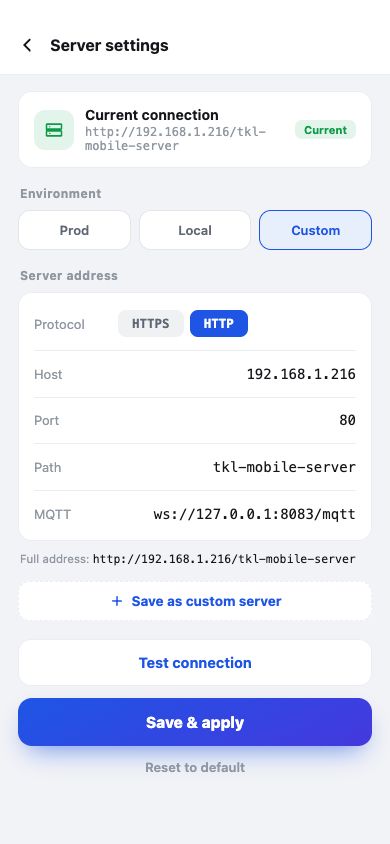
Entry: Server Settings on the sign-in screen, or Profile → Server Config after sign-in.
Select the protocol and enter the host, port, path, and MQTT address. Test the connection before saving. Because 80 is HTTP's default port, the full address may omit :80 while the connection still uses port 80. Leave the service path empty only when the backend is mounted directly at the domain root.
03 Home overview
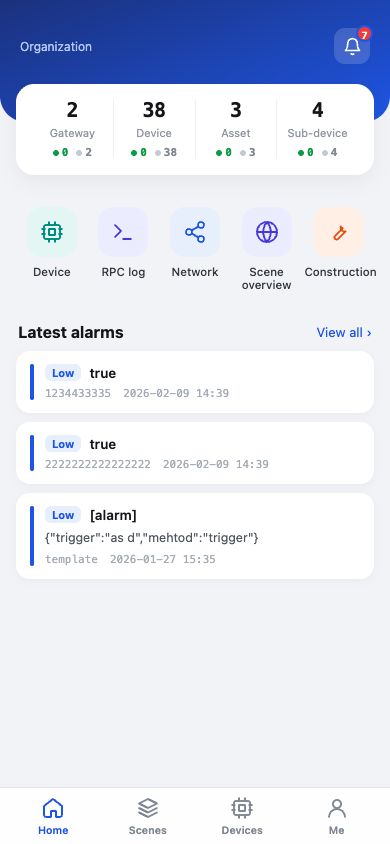
Home summarizes gateway, device, asset, and sub-device totals and their online status. It also provides shortcuts to Devices, RPC Log, Network, Scene Overview, and Construction.
- Pull down to refresh home data.
- Open alarms from the bell, a recent alarm, or View all.
- Tap a shortcut to open its business page.
04 Scenes
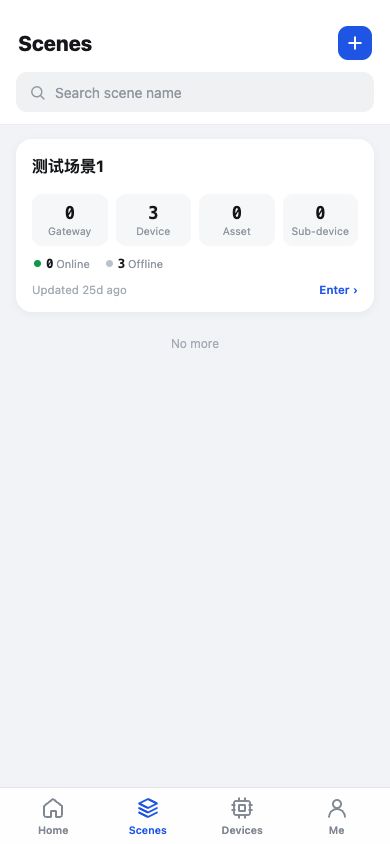
Entry: bottom tab Scenes.
Search by scene name, review gateway, device, asset, sub-device, and online counts, then tap Enter to open scene details.
05 Scene details
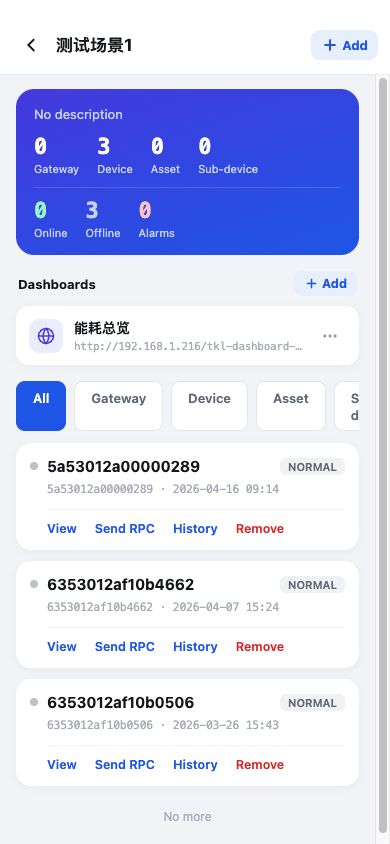
Scene details show statistics, dashboards, and bound devices. A device row can open details, send RPC, query history, or remove the device. Tap Add to bind more devices.
Scene membership
Removing a device changes its scene relationship. Verify the device name and EUI and confirm that it no longer belongs to the scene before removal.
06 Add devices to a scene
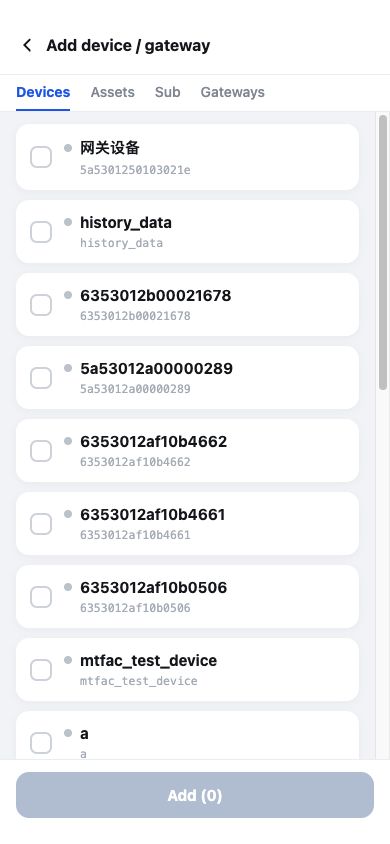
Entry: Scene Details → Add.
- Switch among devices, assets, sub-devices, and gateways.
- Search for and select the required targets.
- Review the selection and tap Add at the bottom.
07 Scene overview
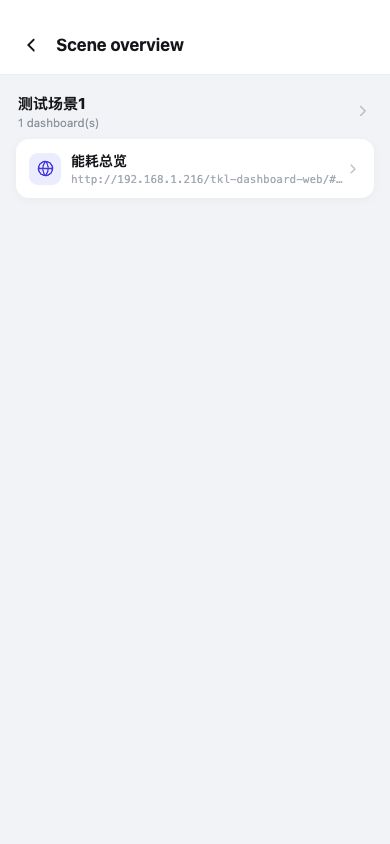
Entry: Home → Scene Overview.
The page groups dashboard counts and dashboard entries by scene. Tap a card to open its board.
08 Dashboard
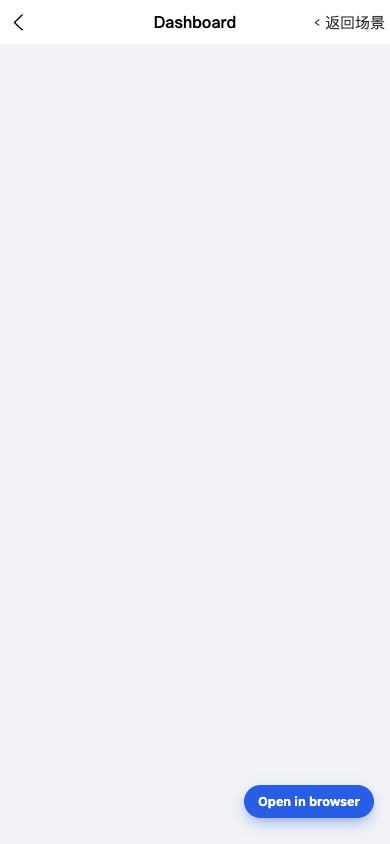
Dashboards display scene visualizations in an embedded web view. Use the page header to return to the scene or open the board in an external browser.
If a dashboard does not load, verify that the phone can reach its URL and that the current session is still valid.
09 Devices
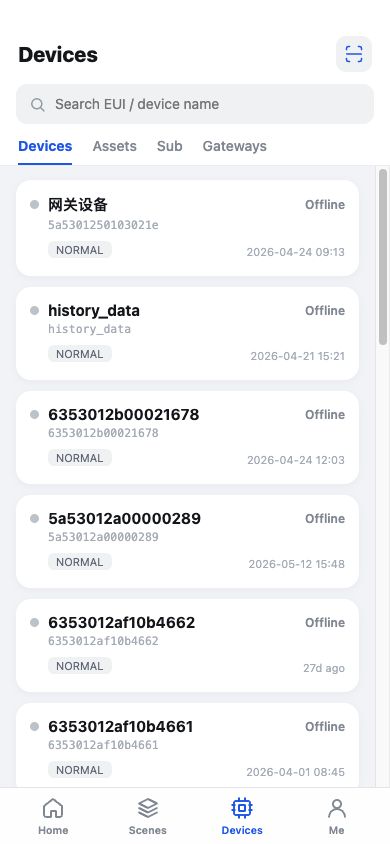
Entry: bottom tab Devices.
- Search by EUI or device name.
- Switch among devices, assets, sub-devices, and gateways.
- Tap an item to open details.
- Pull down to refresh the current list.
10 Device details
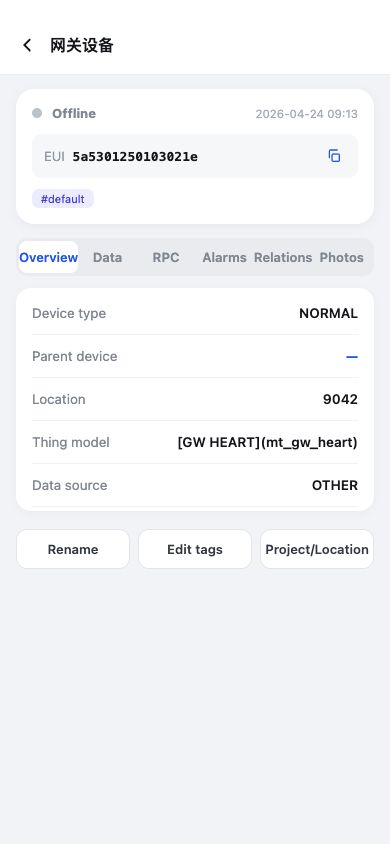
Use Overview, Data, RPC, Alarms, Relations, and Photos to review complete device information. Depending on permission, you can rename a device, edit tags, and assign a project or location.
These edits affect information visible to other platform users. Verify the target device before saving.
11 History
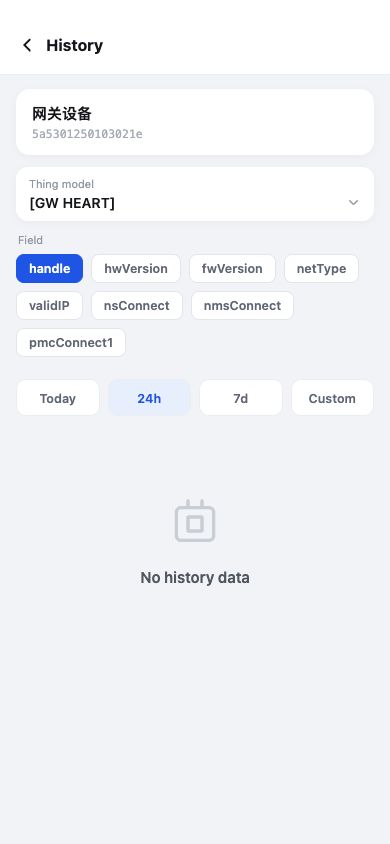
Open history from a device data field or a scene device action. Select a thing model, field, and time range—today, 24 hours, 7 days, or custom—then run the query.
If no data appears, check the selected field and range, device reporting status, and network connection.
12 Gateway details
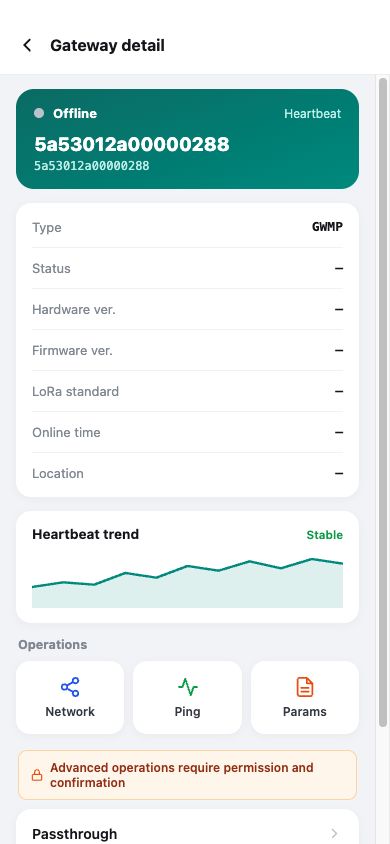
Entry: Devices → Gateways, then select a gateway.
Review heartbeat, gateway type, software version, LoRa standard, online duration, and location. Authorized users may also run network queries, Ping, parameter configuration, pass-through operations, and upgrades.
High-risk operations
Gateway upgrades, pass-through operations, and parameter changes may interrupt field communication. Confirm the gateway, configuration, backup, and maintenance window, and follow your deployment's change process.
13 Network data
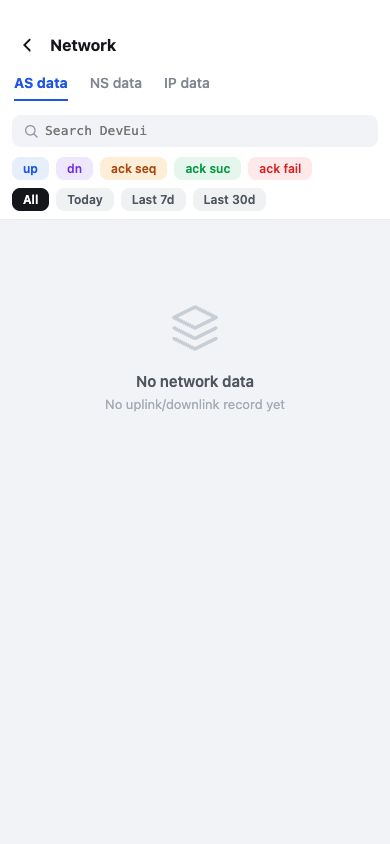
Entry: Home → Network or Gateway Details → Network.
Switch among AS, NS, and IP data, search by DevEUI, and filter by all records, today, the last 7 days, or the last 30 days. Use the results to examine uplink, downlink, and IP communication.
14 Alarms
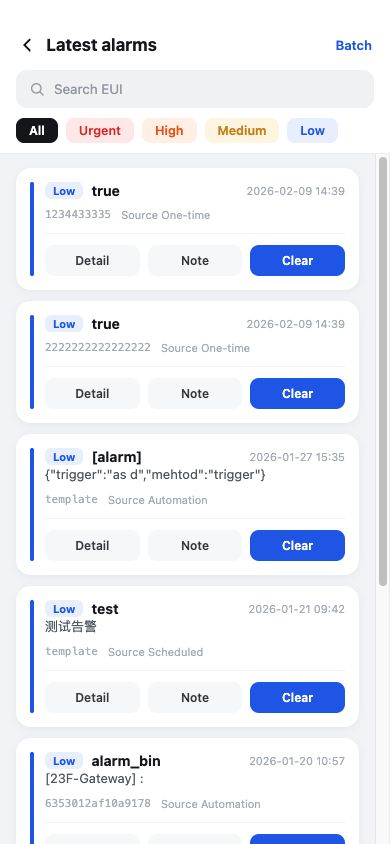
Open the list from the home bell, a recent alarm, or View all. Search by EUI and filter by severity. Each alarm supports details, notes, and clearing; batch mode handles multiple alarms.
15 Alarm details
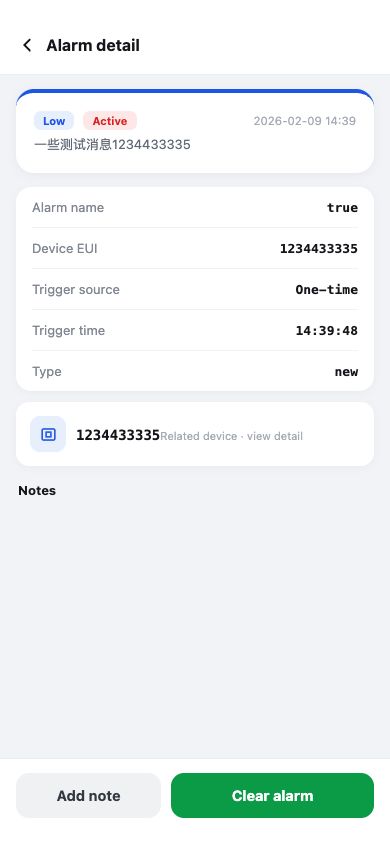
The detail page shows severity, status, alarm name, device EUI, trigger source, time, and type. You can open the related device, add a response note, or clear the alarm.
Clearing an alarm
Confirm that the field condition has been resolved and record the required response notes first. Clearing an alarm does not repair the device or field condition.
16 Send RPC
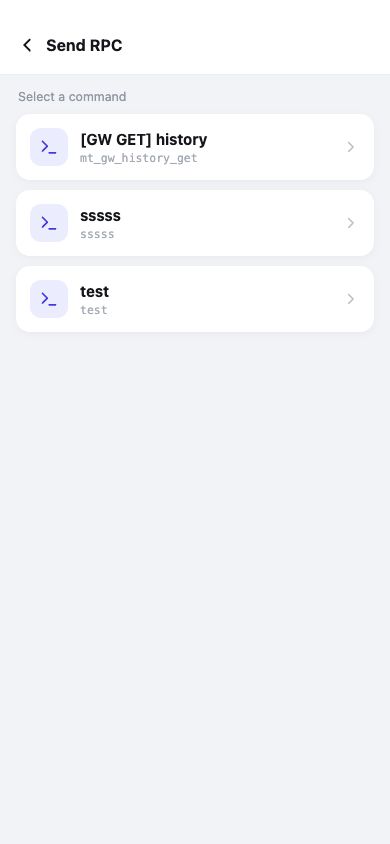
Entry: Send RPC on a scene device, or Device Details → RPC.
- Select a defined command.
- Enter parameters according to its definition.
- Recheck the target device, command, and parameters.
- Execute only after confirming the operational impact.
Remote control
RPC changes device state remotely. Never test a command on an uncertain device or guess parameter values. Confirm field safety and a recovery method before execution.
17 RPC log
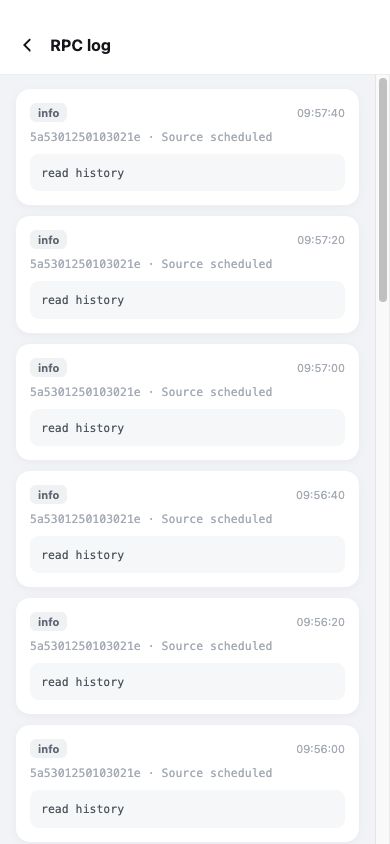
Entry: Home → RPC Log, or the log entry on a device RPC page.
Review timestamp, level, device, source, command, and result for audit and troubleshooting. A successful send does not always confirm that the physical action completed; validate with device data when necessary.
18 Construction
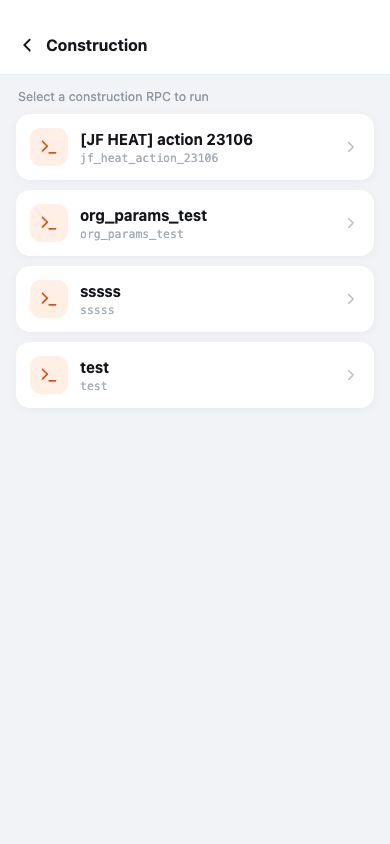
Entry: Home → Construction.
Select a task from the RPC operations approved for construction, enter the requested parameters, and execute. Retain installation photos and other evidence according to project rules. Construction RPC is still remote control, so verify every target and parameter.
19 Profile
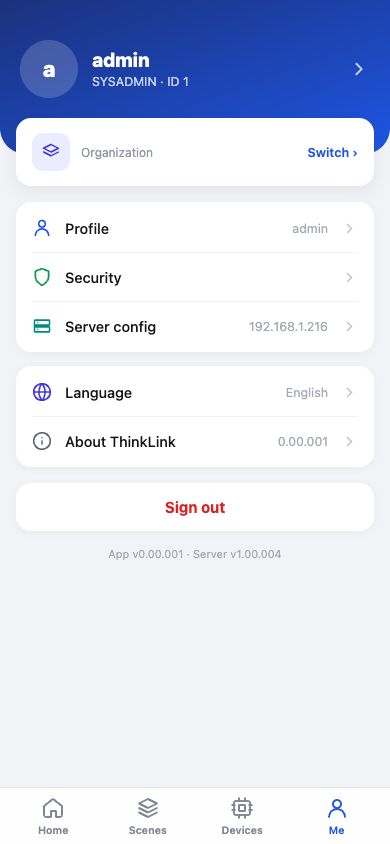
Entry: bottom tab Profile.
Review the account and active tenant, switch organizations, and open Security, Server Config, Language, and About. App and server versions appear at the bottom.
- Switching tenants changes the authorized home, scene, device, and alarm data.
- Signing out clears the current session.
- Always sign out after using a shared device.
20 Security and third-party account binding
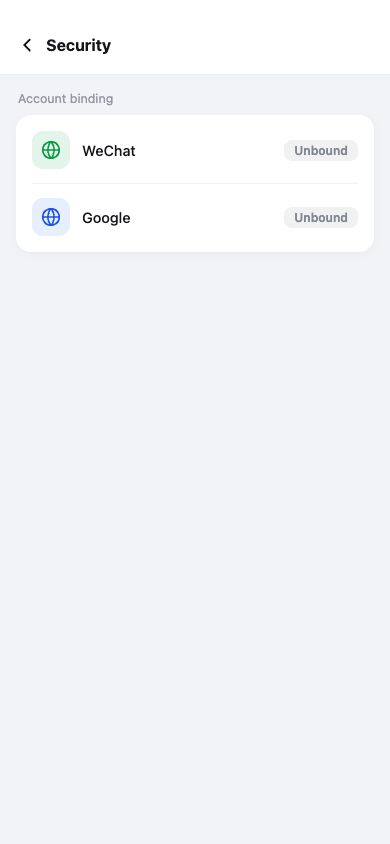
Entry: Profile → Security.
Review the binding status for sign-in methods such as WeChat and Google. When a method is enabled and allowed by the organization, you can bind or unbind it here.
Account safety
Binding and unbinding affect available sign-in methods. Verify the current account identity and make sure at least one usable sign-in method remains.
Security and Permissions
- Users can access only data authorized for their account and active tenant.
- Do not share passwords, tokens, or internal server credentials through screenshots, chat, or public documents.
- Only authorized personnel may run RPC, change gateway configuration, or perform upgrades.
- Do not remember credentials on shared devices, and sign out after use.
- Stop and contact an administrator if the account, tenant, or visible data scope is unexpected.
Runtime Requirements
- The phone must reach the configured Mobile Server. Private addresses require the corresponding network or a controlled VPN.
- Production environments should use HTTPS with a trusted certificate.
- A WeChat Mini Program deployment also requires a valid AppID, approved domains, and network allowlisting.
- The server path depends on the deployment. Leave it empty only when the backend is mounted at the domain root.
Troubleshooting
Cannot connect to the server
Confirm network reachability and check the protocol, host, port, and path individually. Run Test Connection again and do not force-save a failed configuration.
Sign-in fails
Confirm that the correct server configuration was saved, then check account status, password, and tenant authorization. Never send credentials through a public support channel.
Data is stale
Pull down to refresh. Check the network, server, active tenant, and device online status. For historical data, also verify the field and time range.
RPC fails
Check account permission, device status, command definition, and parameter format. Review the RPC log and contact the device or platform administrator instead of repeatedly retrying.
Why is :80 missing from the address?
Port 80 is HTTP's default port. Standard URLs may omit a default port while the connection still uses port 80.
Version and Support
Open Profile → About to view the app, backend, and database versions. When reporting an issue, provide the app version, server version, time of occurrence, page name, and an error screenshot with all sensitive information removed.